Monday, December 20, 2010

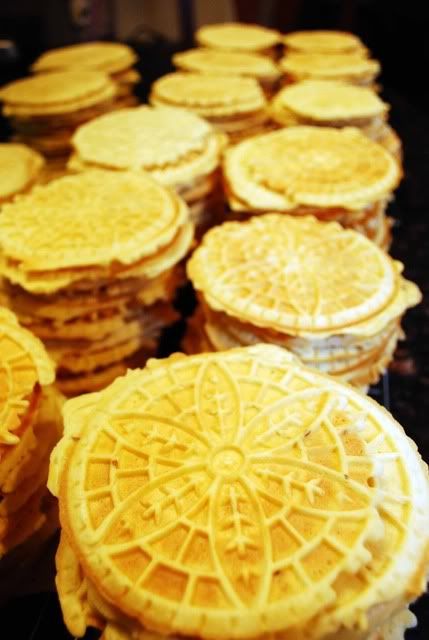
Pizzelles - Italian Waffle Cookies

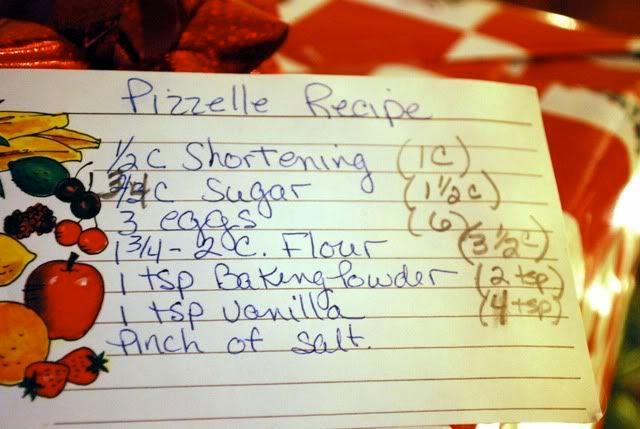
These cookies have been a Christmas tradition in my family starting with my great-grandmother, and possibly before. My mom and I have made them every Christmas since I can remember. She nearly quadruples the basic recipe, which has been in her recipe box on this index card in a plastic sleeve for decades, and then passes them out to tons of family and friends.
Photobucket
Everyone has come to expect them from our family at Christmas time. In order to meet the demand, we bought two pizzelle waffle irons and make a day of it. My mom and I get out the Christmas DVDs and spend nearly a whole afternoon into the early evening pressing these beautiful cookies out two by two while watching White Christmas, Miracle On 34th Street, A Christmas Carol and It's A Wonderful Life . This year however, our antique waffle iron, the one we've been using for decades, died on us. So we were working with one machine and not the better of the two. The one that crapped out on us was an Italian model, all metal waffle iron that made the cookies extra thin. The second iron, more modern, has a non-stick surface. This makes the baking much easier but doesn't make the pizzelles quite as thin and delicate as the Italian iron. Oh well. We made the best of what we had.
Photobucket
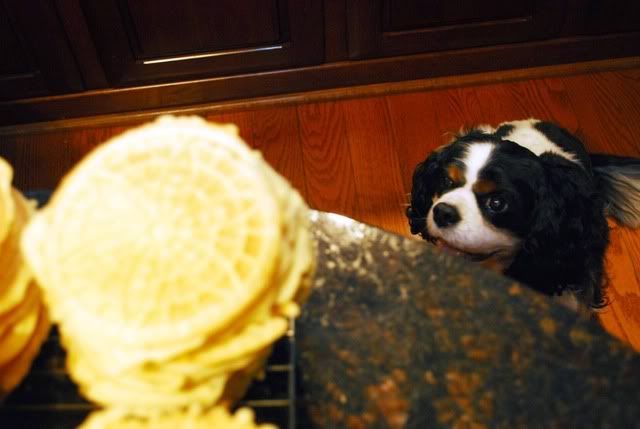
Nonetheless, the season doesn't feel like it has arrived until we bake pizzelles. The house fills with the sweet smell of butter, sugar and anise. The best part of the whole process is eating the ones that bake a little too long or accidentally break when being packed up or pulled from the iron. The challenge is not to eat too many as you go along. Every year for the past 10 years we've had an eager kitchen helper, as you can see. She gladly eats up the scraps and crumbs along the way.
Photobucket
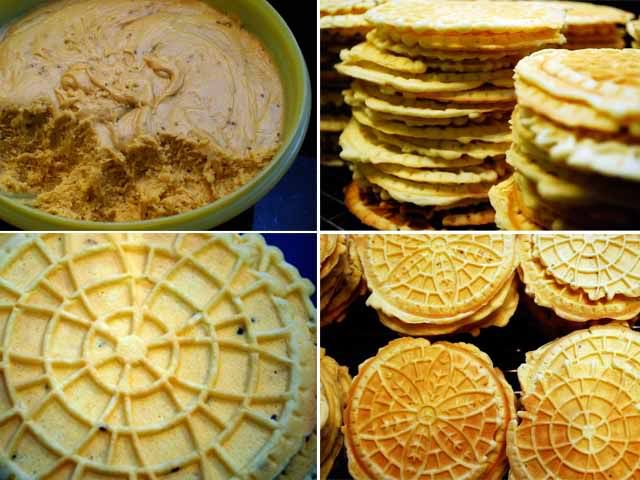
There are hundreds of recipes out there for pizzelles. They are a very simple cookie. Nothing real fancy. They almost taste like a waffle cone and can be a canvas for any flavors you prefer. In my family we have always used anise seed. My mom takes her basic recipe, pictured above, and adds in anise extract and anise seed. My grandmother used to also add lemon or orange zest, but my mom has omitted that ingredient. You can add a little cocoa powder to make chocolate pizzelles, substitute almond extract for the anise seed, or any other kind of extract really. In the end you get a light, wafer-like butter cookie that resembles a snowflake and literally melts in your mouth.
Photobucket
Like most Italian desserts, they go excellently with a nice, hot cup of espresso or other strong coffee. The bad thing about pizzelles is you can eat 6 of them and not even notice. They are addictive and go down like potato chips! You do need a pizzelle waffle iron to make these cookies, an investment that is worth it if, like in my family, you make hundreds of these every Christmas season. Buon Natale!!

Pizzelles
Photobucket
1/2 cup shortening (my mom uses butter)
3/4 cup sugar
3 eggs
1 tsp vanilla
1 1/2 to 2 tsp anise extract
3 tb anise seeds
1 3/4 cup flour
1 tsp baking powder
pinch of salt

In a large mixing bowl, cream the butter and the sugar together. Add in the eggs and incorporate. Next add in the vanilla and anise extract and mix in the anise seeds. In a separate bowl, mix together the dry ingredients (flour, powder). Stir into the eggs, butter and sugar mixture until the dry and wet ingredients are fully incorporated. Chill batter, covered, in the fridge until it's slightly firm, about an hour. Get your waffle iron hot. Once hot, put a tablespoon of batter into each side of the waffle iron. Close and bake. When you close the lid you'll hear the steam hiss and rise out of the iron. After about 15 seconds open up the iron to check your progress. Bake until they are firm but not brown. Burnt cookies will taste bitter because of the anise seed. The time may shorten up as you move along since the iron will get a little hotter. You may burn the first few trying to figure oput how long you need to bake each one for, but eventually you'll figure out how much time your particular iron needs to cook up the batter to a crisp cookie. Remove the cookies gently with a fork and place on a rack to cool. Once cool you can stack your cookies and store them in an airtight container. Cookies will stay fresh for up to two weeks. Enjoy!

Sunday, December 19, 2010

Chocolate Cherry Almond Biscotti

This is a quick, pre-Christmas cookie post. We made these beauties to accompany the date and pistachio biscotti below. These are so good!! I switched the semisweet chocolate for white chocolate and in my opinion it really makes these cookies. It adds just the right amount of sweetness and helps bring out the cocoa flavor in the cookie.
One other thing I changed were the almonds. I couldn't find whole unblanched almonds so I just opted for blanched slivered almonds and used about 3/4 of a cup so as not to overwhelm the batter with almond slivers. It worked out fine. Another note to whoever takes on these cookies - they bake up HARD. These are not biscotti for the wimpy. These are the real deal. Crunchy and a small workout on the teeth. So if you have some weak molars etc. then be sure to soak your biscotti in some strong espresso first, or maybe a little cappuccino. I read that the absence of butter in biscotti recipes gives them that authentically hard, tack-biscuit consistency. If you're not a fan of the harder biscotti then find a recipe that uses butter. I found these to be just perfect though.
On top of that, they are just plain ole' pretty. The color contrast is nice and the little colored beady sprinkles stand out nicely against the snowy white chocolate background. They just put me in the holiday mood. How about you? I hope you get a chance to enjoy some delicious cookies this season.

Dried Cherry and Chocolate Biscotti with Almonds
Source: Emeril Lagasse, www.foodnetwork.com
Photobucket
2 cups flour
1/4 cup cocoa powder
2 teaspoons baking powder
Pinch of salt
1/4 teaspoon cinnamon
1 cup unblanched whole almonds
1 cup dried cherries
3 large eggs
3/4 cup sugar
1 teaspoon pure vanilla extract
8 ounces semisweet chocolate, melted
Directions
Preheat the oven to 350 degrees F.

In a mixing bowl, sift the flour, cocoa powder, baking powder, salt and cinnamon. Stir in the almonds and cherries.

In another mixing bowl, whisk the eggs, sugar, and vanilla until smooth. Stir the dry ingredients into the egg mixture. Mix well. Lightly dust the work surface. Turn the dough onto the surface and knead the dough a couple of times. Shape the dough into a log, about 12 inches long and 4 inches wide. Place the dough on a parchment lined baking sheet and bake for about 30 minutes, or until golden and firm to the touch. Remove from the oven and cool completely on a wire rack. Using a serrated knife, slice the bread diagonally into 1/4-inch slices. Place the slices on a parchment lined baking sheet and bake for an additional 12 to 14 minutes or until golden and crispy.

Remove from the oven and cool completely a second time on a wire rack. Dip half of each biscotti in the melted chocolate and place on a parchment lined baking sheet and refrigerate until the chocolate sets.

Tuesday, December 14, 2010

Chocolate-Dipped Date and Pistachio Biscotti

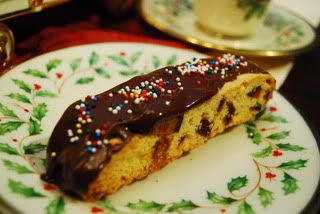
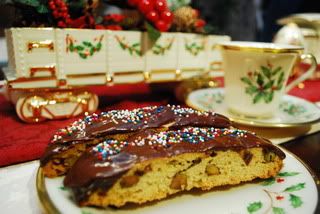
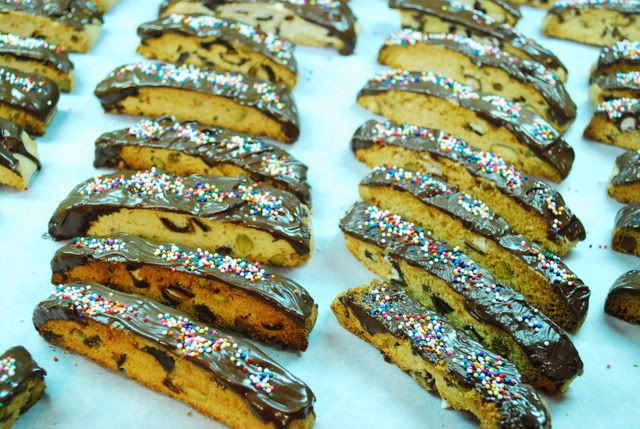
For years my mom and I always made the same cookies for Christmas. Gingerbread men and sugar cutout cookies (which both involve rolling, cutting and decorating), Mexican tea cookies (also called Russian tea cookies or Pfefferneusen or something like that), chocolate chip cookies and Pizelles. This year I just didn't have the energy or the time for making that many labor-intensive cookies so I decided to keep it simple. We made Pizelles, which I will post about shortly, as well as two kinds of biscotti. I find biscotti to be a pretty simple, quick cookie to make since there is no rolling or even dropping by the tablespoon involved. You simply cut the dough in quarters or halves, form it into logs and bake it whole. Then you cut it and toast the biscotti - making them twice-baked cookies. For a special touch, we dipped these particular fruit and nut biscotti in melted semi-sweet chocolate.
PhotobucketPhotobucket
These biscotti were inspired by a recipe for Fig and Pistachio Biscotti on Proud Italian Cook's blog. I made a lot of changes and omissions however, so here is my version below. I substituted dates for figs because my mom had bought a huge bag of dried medjool dates to make an appetizer for Thanksgiving and we had plenty left over so instead of spending more money for figs, we used what we had. Also, since the Pizelles we make every year are anise flavored, I didn't want the biscotti to be as well. Plus, I'm not a huge fan of anise so I eliminated that ingredient. I just put in extra vanilla extract. Also, as I've said before on this blog, you won't catch me within 50 yards of a piece of zest. I'm not a fan, no matter how hard I try to like it, I just don't. Orange, lemon or lime, it doesn't seem to matter. I just don't like citrus zest. Sorry, not happening to my baked goods! Oh well. So, in short (ha), I left that ingredient out as well. Lastly, I dipped them in melted chocolate to add a holiday touch. I also added in a touch of cinnamon to give them a warm finish.
Photobucket
They turned out nice and crumbly. Apparently, biscotti made with butter have more of a cakey texture and those without butter have more of a traditional hard, crunchy consistency. These leaned toward the cakey end, but still had a nice toothy crunch. Hopefully you have time to enjoy a little holiday baking this season! These aren't too hard to make inbetween shopping and trimming the tree. Enjoy!

Chocolate-Dipped Date and Pistachio Biscotti
Photobucket
1/2 cup unsalted butter, room temp
3/4 cup sugar
2 large eggs
2 t. vanilla extract
1/2 tsp cinnamon
2 1/4 cups all-purpose flour
1 1/2 t. baking powder
1/4 t. salt
1/2 cup shelled pistachios
1 cup chopped pitted dates
8 oz semisweet chocolate chips


Heat oven to 350 degrees.
With your mixer, beat butter and sugar on medium-high until smooth, about 2 minutes.
Add eggs and extract beat until creamy and light.
Combine dry ingredients together, then add to the butter mixture, add the dates and the nuts last.
Mix everything on low speed until incorporated then remove dough and divide in half.
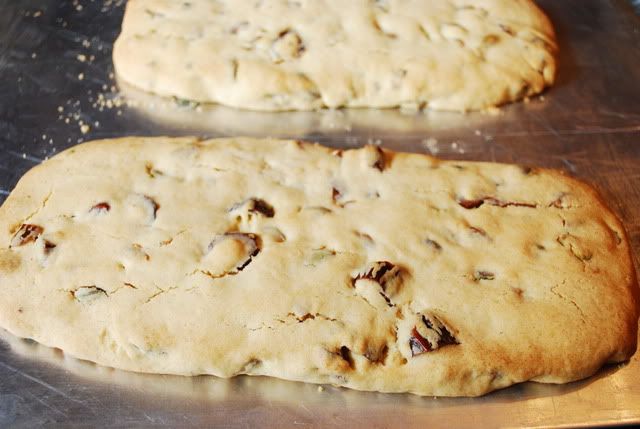
Form two 7×3 inch logs, place on parchment lined baking sheet apart from each other, and bake until lightly browned (25 to 30 minutes).
Remove from oven, and let them cool down, you can't cut them when they're hot they'll crumble.
Photobucket
Using a serrated knife, take your time and slowly cut logs into 1/2″ thick slices.
Arrange biscotti on their sides on the baking sheet. Return to oven, and bake until golden, about 10-15 minutes. Turn biscotti over on the other side and bake for another 10-15 minutes more, or until desired crispiness. Cool on racks.
Once cool, melt your chocolate over a double boiler. Once melted, dip the tops of your biscotti in and sprinkle with jimmies or cookie decorations if desired. Chill in the refrigerator until the chocolate sets back up and then enjoy!
Makes around 36-40.

Sunday, December 5, 2010

White Bean and Brussel Sprout Soup

Well, it's here. Winter. Cold, blustery, bitter and raw. They are even calling for snow flurries today! I guess I shouldn't complain. It is December, after all (as I keep hearing people say). Nothing could be as crazy as last winter when we had blizzard after blizzard of unrelenting snow. I swear it didn't melt till May!
At least it puts you in the holiday spirit. Speaking of holidays, do you have your tree up yet? We do! I've also already watched the obligatory Christmas movies and had the required festive eggnog while tree trimming. That is required, right?? Hee.

And in the spirit of Christmas here is a nice abstract shot of our tree from outside our house:
Photobucket
And here's a pic of our most favorite Christmas blessing of all, sleeping in "HEAVENLY" peace, as the song so beautifully says:
Photobucket

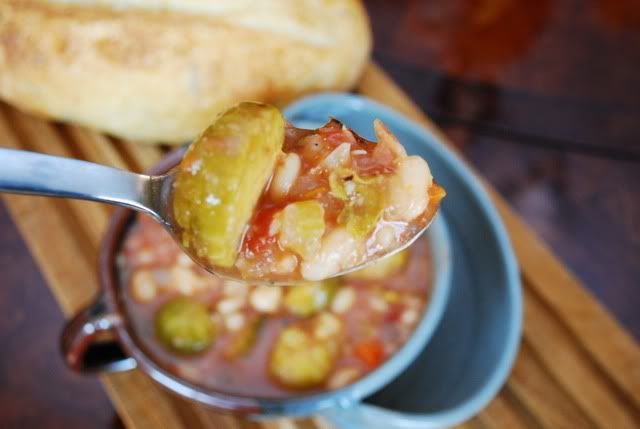
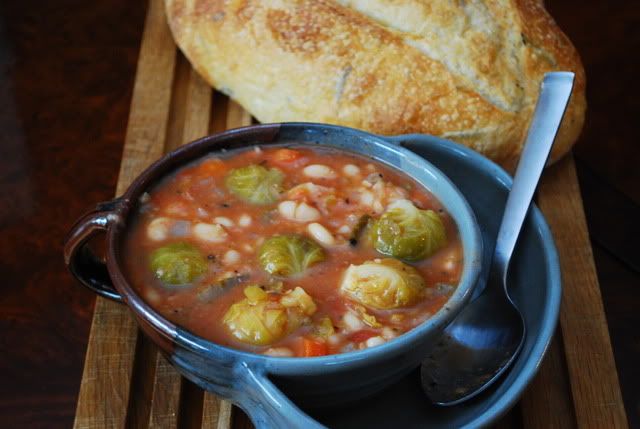
Anyway, the one redeeming thing about cold weather is the host of foods it inspires me to cook. Mainly - soup. I love a hearty bowl of warm, homemade soup on a cold, winter's night. There is NOTHING better in my opinion. I have some favorites, onion soup, traditional minestrone and roasted tomato bisque. However, last night we were looking to use up some brussel sprouts in the fridge so I fashioned up a tasty soup that made these mini-cabbage heads the star. You can just rinse them, cut them in half and throw them into the soup raw. They will boil in the broth while the beans soften up, floating like little green apples while your soup simmers.
Photobucket
You can easily make this with canned beans, but it's not that much harder to use dried beans and you really get your money's worth as well as a major flavor payback with dried beans. If you use canned beans however, you'll want to probably cook your brussel sprouts ahead of time since you won't have to simmer the soup as long.
Another tip, I like a thicker soup consistency, so, as you'll see in my recipe, I pureed two cups of beans once they were cooked, and then stirred them back into the soup to thicken up the broth. If you like a thinner, clearer type of soup then just skip that step. We topped our soup with crispy cubes of prosciutto and a generous spoonful of grated Romano cheese.
Finally, a word of warning. Eat this soup with ones you love. Beans and brussel sprouts can be a dangerous combination, if you know what I mean. So tread lightly but don't be afraid - the taste is worth it! Or Beano before if you must.
Enjoy!

White Bean and Brussel Sprout Soup
Photobucket

1 lb dried white beans
1/2 cup cubed prosciutto
1 onion, diced
4 cloves garlic, minced
2 carrots, chopped
1 celery stalk, chopped
2 tb fresh rosemary, finely chopped
2 tb olive oil
1 qt chicken stock
2 cups water
1 can diced fire-roasted tomatoes with juice
1 bay leaf
1 lb brussel sprouts, rinsed, trimmed and then cut in half
salt and pepper for seasoning
grated pecorino romano cheese for serving

Soften the beans first. Rinse the beans, place in a large soup pot, and add cold water to cover by 2 inches. Bring to a boil and let simmer for 2 minutes, cover, and remove from the heat. Let stand for about 1 hour, then drain. Place aside.
In the bottom of that same soup pot, place your cubed prosciutto and crisp up over medium heat. Once the prosciutto has browned and crisped, remove it from the pot and set aside. You'll use this to top your soup when serving.
In the same pot, throw in your onion, garlic, carrots, celery, rosemary and olive oil. Saute them in the prosciutto grease and brown bits until softened. Once softened, add your drained beans to the pot along with the rest of your ingredients, stock, water, tomatoes, bay leaf and brussel sprouts. Bring to a boil and then reduce to a simmer. Allow soup to simmer uncovered until the beans are tender and the brussel sprouts have cooked. Miraculously, these two things seem to happen at the same rate, which ends up being about 30-40 minutes, depending on your stove.
Once done and the beans are tender, strain out two cups of beans (these will unavoidably include celery, onion, carrots and garlic but if you can try to avoid whole brussel sprouts and leaves within these two cups). Puree the beans and miscellaneous vegetables in a food processor until smooth. Return this puree to the soup pot and stir to combine. This will help thicken your soup to a nice consistency. Ladle soup into bowls, top with crispy prosciutto and grated romano cheese and serve.

Friday, November 26, 2010

Almost-Famous Pumpkin Cheesecake

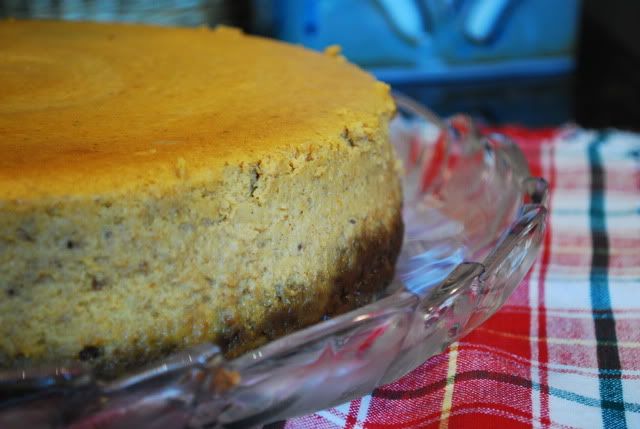
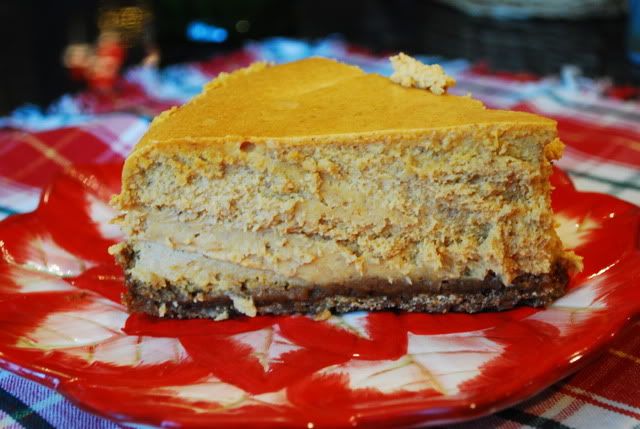
I didn't bestow that title on this seemingly celebrity-status dessert. That's the name it came with! I was determined to make a pumpkin cheesecake for Thanksgiving and I found several recipes in magazines and online. This particular recipe seemed special to me however. It made a large, restaurant size cheesecake with a super-buttery crumb crust and I just couldn't resist it's name. They totally reeled me in with the guarantee of "almost famous". It must be good then...right?? Well, fortunately, it was. It was more than good. It was stupendous!
Photobucket
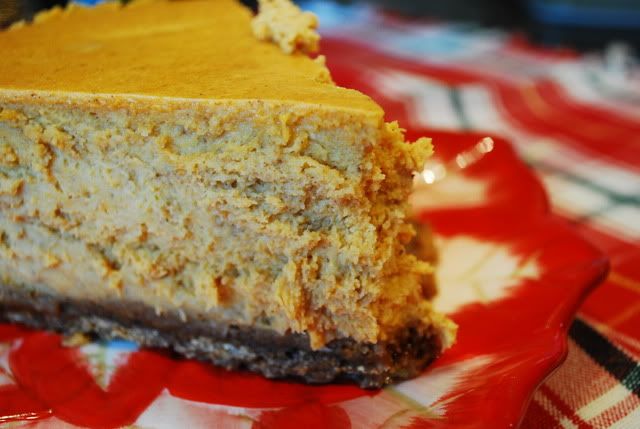
Cheesecake on Thanksgiving is definitely a risk since you're asking people to eat a huge meal and then throw down a very rich dessert. Our crowd took on the challenge however, and did pretty well. And those who couldn't stuff in dessert took home slices of this spicy pumpkin dessert. I think those who took pieces home might actually enjoy it more than those who shoved it in after overloading their tastebuds on turkey and fixins. I would rather enjoy this cheesecake as a meal the day after Thanksgiving. It definitely deserves that kind of special attention.
Photobucket
A few notes about the recipe. For one, I substituted gingersnap cookies for the graham crackers in the crust. Another note about the crust, the 12 tablespoons of butter is too much, in my opinion. If I was to do it again, I'd probably use half the amount of butter. I used the whole 12 tablespoons and during the pre-baking process the butter was dripping out of my springform pan onto the oven floor causing my oven to smoke horribly. The house was full of thick smoke from the burning butter on the bottom of my oven. And honestly, it was just too much damn butter (and I thought I'd never say that, too much butter? How is it possible right?). But it's true. A little less and believe me you won't notice the difference in taste. The cheesecake part itself packs enough punch. Enjoy!
Almost-Famous Pumpkin Cheesecake
www.foodnetwork.com
Photobucket

12 tablespoons unsalted butter, melted
2 1/2 cups graham cracker crumbs
2 3/4 cups sugar
Salt
2 pounds cream cheese, at room temperature
1/4 cup sour cream
1 15-ounce can pure pumpkin
6 large eggs, at room temperature, lightly beaten
1 tablespoon vanilla extract
2 1/2 teaspoons ground cinnamon
1 teaspoon ground ginger
1/4 teaspoon ground cloves
2 cups sweetened whipped cream
1/3 cup toasted pecans, roughly chopped
Directions
Position a rack in the center of the oven and preheat to 325 degrees Fahrenheit.

Brush a 10-inch springform pan with some of the butter. Stir the remaining butter with the crumbs, 1/4 cup of the sugar and a pinch of salt in a bowl. Press the crumb mixture into the bottom and up the sides of the pan, packing it tightly and evenly. Bake until golden brown, 15 to 20 minutes. Cool on a rack, then wrap the outside of the springform pan with foil and place in a roasting pan.

Bring a medium pot of water to a boil. Meanwhile, beat the cream cheese with a mixer until smooth. Add the remaining 2 1/2 cups sugar and beat until just light, scraping down the sides of the bowl and beaters as needed. Beat in the sour cream, then add the pumpkin, eggs, vanilla, 1 teaspoon salt and the spices and beat until just combined. Pour into the cooled crust.

Gently place the roasting pan in the oven (don't pull the rack out) and pour the boiling water into the roasting pan until it comes about halfway up the side of the springform pan. Bake until the outside of the cheesecake sets but the center is still loose, about 1 hour 45 minutes. Turn off the oven and open the door briefly to let out some heat. Leave the cheesecake in the oven for 1 more hour, then carefully remove from the roasting pan and cool on a rack. Run a knife around the edges, cover and refrigerate at least 8 hours or overnight.

Bring the cheesecake to room temperature 30 minutes before serving. Unlock and remove the springform ring. To finish, place a dollop of the whipped cream on each slice and sprinkle with the toasted pecans.

Tuesday, November 23, 2010

A Beautiful Wedding

Ok so no I'm not turning this into a photo blog! But my friend's wedding was so beautiful I just had to share some pics. Being an Indian wedding, there was a lot of great color and photo opportunities. I love my camera and recently acquired an external flash, making it that much easier to get some fabulous indoor shots at night. I'm also using a new editing software that takes all the mystery out of making good photos look professional! So here are a few pics from the big day. And, as a teaser, I just finished baking an awesome pumpkin cheesecake for Thanksgiving dinner. We're having about 20 people at my mom's house and the menu is vast! More to come....

The groom came in on a horse with his nephew!
Photobucket
The beautiful bride!
Photobucket
The groom's sister sporting some great Indian jewelry.
Photobucket
The cake topper - the bride wore a vibrant blue and crystal dress for the reception that matched the cake topper exactly!
Photobucket
The couple during the toasts.
Photobucket
Sunset shots at the gorgeous bayside venue in Chesapeake Beach!
Photobucket
Photobucket

Sunday, November 21, 2010

Mehndi Party!

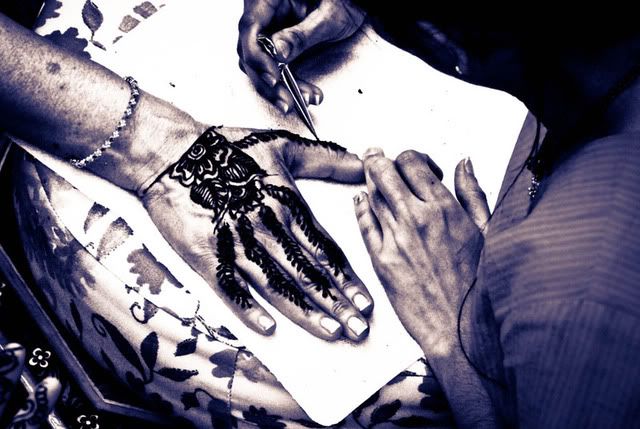
One of my best friends from middle school got married this past weekend and before the wedding she held a Mehndi Party, which is a traditional ritual within the Indian wedding ceremony. The bride and her family and friends gather to see the bride get the Mehndi tattoo, painted on by hand out of red henna paint. My friend asked me to be her "unofficial" photographer for the night's event so here are my results. What a fun and beautiful event to be a part of and I really enjoyed the task of capturing it on film! I wanted to share some with everyone since I've been a little lacking on the food updates lately. Thanksgiving is coming though so more food to come. Meanwhile, here are some pretty pics to distract and entertain - and notice, I did squeeze one in of the yummy Indian foods her mom served at the party. Yum! Enjoy!
Photobucket
Photobucket
Photobucket
Photobucket
Photobucket
Photobucket
Photobucket
Photobucket
Photobucket Photobucket
Photobucket
Photobucket

Wednesday, November 3, 2010

Manchego-Stuffed Pork Saltimbocca

So dinners at my house have been pretty boring as of late. There are two very good reasons for this. For starters, my nearly 6-month old baby makes planning elaborate dinners nearly impossible. Secondly, my husband has decided he needs to lose what he calls his baby weight and so is on a low-carb diet (the only diet that ever works for him, so he says). Because of this, our dinners lately have been simply grilled fish, chicken or steak with either steamed veggies or a green salad. Nothing much to blog about. However, last night I was sick of the same old thing and decided I could throw together something with a little more flavor and ingenuity that wouldn't take hours.
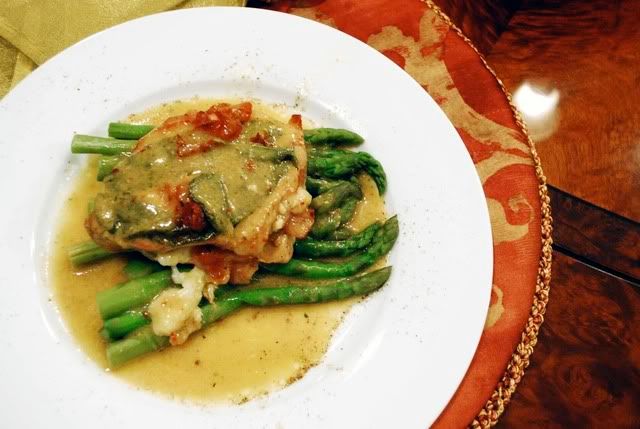
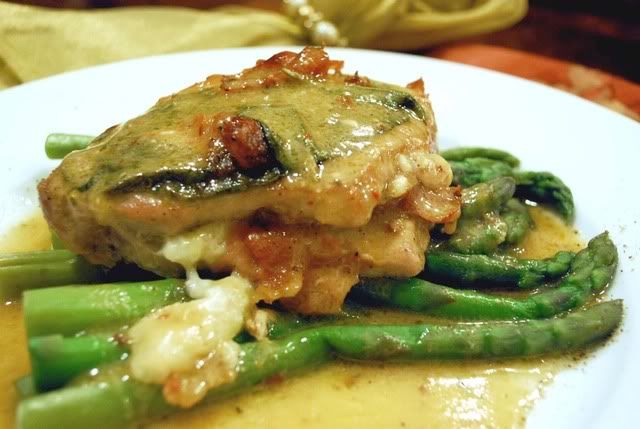
Enter manchego-stuffed pork saltimbocca .
Photobucket
This is my slightly, kicked-up version of the traditional saltimbocca preparation, which marries prosciutto and woodsy sage with seared chicken or pork in a simple lemon butter pan sauce. I served mine stuffed with nutty manchego cheese alongside some steamed asparagus. It satisfied all our dinner needs, quick, low-carb and delicious! Saltimbocca literally means jump in your mouth and the combination of cheese, salty prosciutto and the earthiness of the sage do just that. Your tongue will be dancing for joy when you taste this easy to prepare dish. Enjoy!

Manchego-Stuffed Pork Saltimbocca
Photobucket

2 boneless pork medallions, about 1 1/2 in thick each (the thicker they are the easier they are to stuff)
2 slices of thinly-sliced prosciutto
4 sage leaves
1/2 cup shredded manchego
juice of one lemon
1/2 cup chicken stock
3 tablespoons butter
1/2 tablespoon dijon mustard
salt and pepper
olive oil

Season your pork with salt and pepper on each side. Cut a pocket in each pork loin, being careful not to split the medallions in half. Fill each pocket with about a 1/4 cup of your shredded cheese. On the top of each pork loin lay two sage leaves and press flat. Finally, wrap your prosciutto around the pork medallion.
Preheat oven to 350. Heat a saute pan over medium heat and cover the bottom with a thin layer of olive oil. Once shimmering, add your medallions, sage side down. Let sear for 3 minutes on each side and then place the pork medallions in an oven-safe dish and cook the rest of the way - 20 minutes or until center is not pink.
Meanwhile, add your lemon juice and chicken stock to the saute pan. Scrape up any brown bits from the pork. Whisk in the tablespoons of butter and the dijon mustard. Bring the sauce to a rapid simmer and then reduce heat. Allow to thicken and reduce while occasionally whisking. Season with salt and pepper. Once pork is done, serve over top of steamed asparagus and cover with your pan sauce.

Tuesday, October 26, 2010

Fall at the Beach

I went down to the Eastern Shore one last time for the season with my family. It was a beautiful fall weekend with the temperatures in the 70s!
Photobucket
I forced them all onto the beach for a little amateur photo session and I'm so glad we did because the results were awesome! Between my mom and myself we got some beautiful pics and after some editing they are pure artwork to me :) Hope you are enjoying the beautiful fall weather in your neck of the woods! I should have some food updates soon, but meanwhile here is some eye candy.
Photobucket
Photobucket
Photobucket
Photobucket
Photobucket

Sunday, October 17, 2010

Tiramisu Ice Cream

Is it just me, or does it seem like Tiramisu had it's hey-day as a trendy dessert years ago? Regardless I never really got into the sudden hype over Tiramisu. It seemed to be everywhere back in the mid-90's! Every restaurant, even the bad ones, had Tiramisu on their dessert menu. It was mentioned in movies, think Sleepless in Seattle , and seemed to be the ultimate dessert.
Photobucket
I've seen it served in a fancy champagne glass, two pale lady finger cookies swimming in a pool of spiked zabaglione and sprinkled with cinnamon. Other places have it in cake form, layers of lady finger cookies topped with a mascarpone cream, dotted with chocolate and cinnamon and soaked in coffee and rum. Something about it just never appealed to me, but I couldn't put my own lady finger (haha) on what it was (I'm such a sucker for puns!), until recently when I was flipping through David Lebovitz's book The Perfect Scoop . It's the lady fingers I don't like! Because honestly, what else in it is there to dislike? Epresso, good! Mascarpone, good! Chocolate, good! Liquor, GOOOOOOOD!
Photobucket
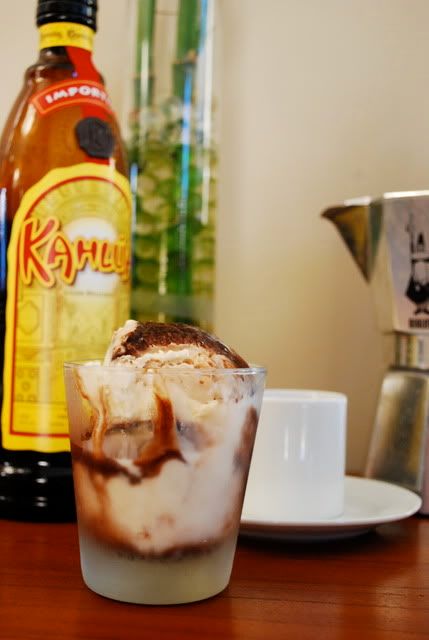
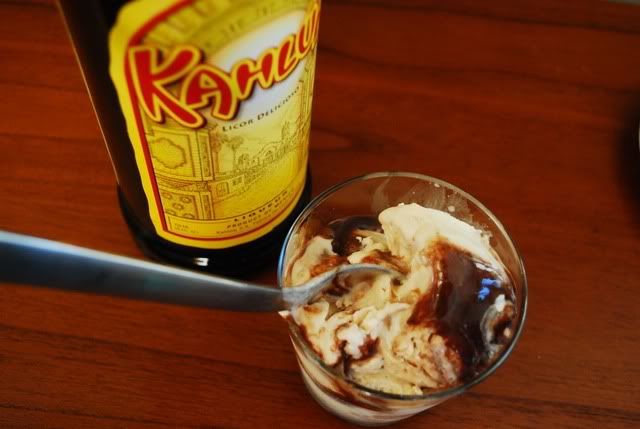
I didn't see any reason not to make David's Tiramisu Ice Cream . Not only was it easy to assemble - no tempering of raw egg yolks etc. - but, the ingredient list just sounded divine. It's not a traditional ice cream, since the base is made up mostly of mascarpone cheese. It ends up being QUITE rich, which is largely due to the silky chocolate ribbon that gets swirled in. Less is more with a scoop of this ice cream. In fact, I found that a scoop of this mixed with a scoop of Breyer's Vanilla was the perfect marriage. It subdued the richness of the Tiramisu Ice Cream and stretched the flavor a little bit. So if you're not too concerned about your waistline, give this recipe a try. Oh and (as if you haven't heard this a million times) Tiramisu means "pick me up" in Italian and it's named so because of the espresso in the dessert. The taste of this ice cream will definitely wake up your taste buds, but it's so rich and luxurious it won't have you ready to get up and go afterwards. Maybe it's named "pick me up" because it's so tasty you can't help but pick it up and eat it! Enjoy!

Tiramisu Ice Cream
Source: The Perfect Scoop, by David Lebovitz
Photobucket

2 cups mascarpone
1 cup half and half
2/3 cup sugar
pinch of salt
1/4 cup coffee-flavored liquer, Kahlua
3 tablespoons brandy or dark rum
Mocha Ripple (recipe below)

Puree the mascarpone, half and half, sugar, salt, liquer and rum together in a blender or food processor until smooth and the sugar is dissolved. Chill thoroughly in the refrigerator.
Freeze in your ice cream maker according to the manufacturer's instructions. As you remove it from the machine alternate layers of Mocha Ripple with the frozen ice cream in the storage container.

Mocha Ripple
1/2 cup sugar
1/3 cup light corn syrup
1/2 cup strongly brewed espresso
6 tb unsweetened cocoa powder
1/2 tsp vanilla extract

Whisk together the sugar, corn syrup, espresso and cocoa powder in medium saucepan. Heat over medium heat, whisking constantly until the mixture begins to bubble at the edges. Continue to whisk until it just comes to a low boil. Cook for 1 minute, whisking frequently. Remove from the heat, stir in the vanilla, and let cool. Chill in the refrigerator before using. Can be stored for up to two weeks in the fridge.

Saturday, October 9, 2010

Mom's Jewish Apple Cake

So no we're not Jewish. In fact, I was tempted to rename this, Mom's Italian Apple Cake, since we are in fact, Italian-Americans. But I need to give credit where credit is due and unfortunately Italian's can't claim this deliciously moist, rich and fruity cake. Darn.
Photobucket
I don't know who, where or how my mom came into possession of this particular recipe for Jewish Apple Cake, but it's been in her Land-o-Lakes recipe box for decades. Fortunately, the tattered index card is in a protective plastic sleeve so we're still able to enjoy this recipe as often as possible. She's made it countless times for birthdays, neighbors, friends and even a bake sale or two. It's a fairly simple cake to make and it turns out nearly perfect every time. And what makes it even more perfect is when it is made with locally grown, fresh-picked Maryland orchard apples.
Photobucket
I visited a local pick-your-own apple farm a few weekends ago and came home armed with a large bag of Ida Red apples - good for eating, but perfect for baking. These tart, yet sweet apples remain nice and crisp through the baking process and end up with a toothy bite.
Photobucket
They are really the perfect balance of tart, sweet and crisp that you need for a pie or cake. And this cake nestles these delicious apples in a cinnamon-sugar mixture and then envelopes them in dense and intensely moist batter. On top of that, I fortunately, had enough apples to make a hearty apple pie in addition to the apple cake. Gosh I love Fall!! And speaking of apples, here's a pic of the "apple" of my eye, my sweet baby girl :)
Photobucket
She's loving Fall too and I love all the great cutie patootie outfits out there for little babies. I love my girl and love dressing her up! That's her in her first pair of jeans and flannel for the season. Hats off to Fall! There's so many wonderful foods to come - squash, pumpkins, brussel sprouts, turkey, cheesecakes, soups. Strap on those elastic waistbands and let the fall eating begin!! Why not start with this cake? Enjoy!

Jewish Apple Cake
Photobucket

For the apples:
5 to 6 apples, cored, peeled and sliced thinly
3/4 cup sugar
2 tb cinnamon

For the batter:
3 cups flour
1 tsp salt
3 tsp baking powder
1/4 cup orange or pineapple juice
4 eggs
1 cup oil
2 cups sugar
2 tsp vanilla extract

Preheat oven to 350. Grease and flour a tube pan for baking.
In a large bowl, toss your sliced apples with sugar and cinnamon and set aside. In a separate small bowl, mix together your dry ingredients - the flour, salt and baking powder. Then in a large mixing bowl combine your juice, eggs and oil until combined. Pour in the sugar and extract and mix until well incorporated. Now in your prepared tube pan, layer batter then apples then batter then apples and finishing up with a layer of batter. If you have any juices that have collected from your apples simply pour them into the cake once your done building up the layers. These sweet, cinnamony juices will contribute to the moistness of the cake.
Bake for 1 1/2 hours until the cake fills the tube pan and a cake tester comes out clean. Let cool in pan and then remove and serve.